

Some recent photos
Well hello there. No posts in a while, but tonight as I was syncing my iPhone, I felt inspired to put up two recent photos of my tank.
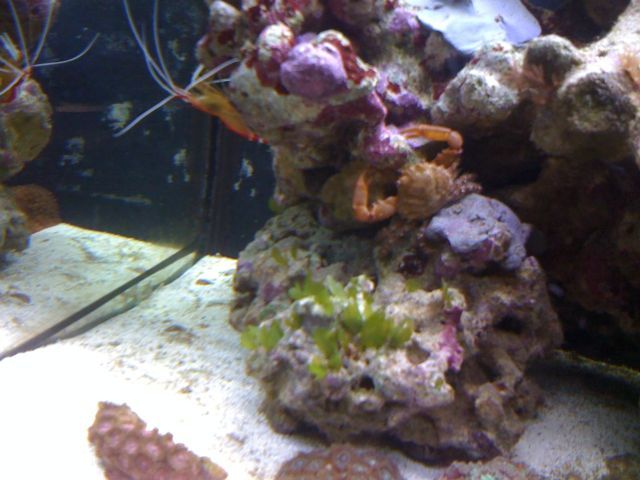
These were taken with my iPhone 4 under actinic lighting. My tank has been running well. I’m very happy with my set-up and the mods that I’ve done. Tank requires very little maintenance and Ive been getting away with stretching out the water changes to every two weeks or so.

All of my inhabitants seem happy in their little reef cube world. I particularly like my feisty little emerald crab. He definitely wears the pants in the tank.

Cleaner Shrimp and Emerald Crab
Haven’t updated In a while. I’m really happy with the way the tank is coming along. Here’s a quick pic of my cleaner shrimp and emerald crab.
Algae bloom and the first members of the CUC
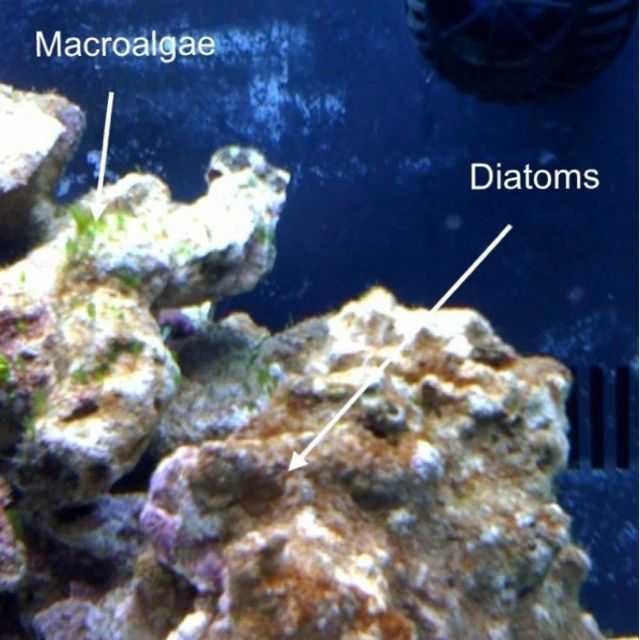
My tank has been running smoothly. All of the parameters are good, except that the magnesiums was low at 1120. The set up with the timers and the auto top off system are all working well. Here is a FTS showing the algae bloom.


Macroalgae and Diatoms
The live rock is starting to show signs of life and I’m starting the diatom bloom.
Checked water
Checked the water parameters tonight for the cube. All is well. Ammonia and Nitrites are zero. Nitrates are 5 ppm, pH is 7.8.
It seems that the nitrogen cycle is complete. There are some signs of life on my rock. I’ve seen some polyp, some squirt colonies and sone fan worms, as well as some macro algae.
Will wait for a while, adding clean-up crew after the algae/diatom bloom. I’m looking forward to watching life emerge from my rocks. After several weeks, I will add some hardy mushrooms and Zoanthids.
I have the nano-tuners 3.24 lighting upgrade installed, and I’m very happy with it. It was a doable install. More light with this kit, but my temperature in my tank has been cooler than before because this kit comes with upgraded fans.
That’s it for now
Second Chamber Media Basket
Here is a graphic of the inTank Media Basket by Stevie T in the second chamber. The little refugium is very cool!


Biocube is back in action!!
Just set up my BioCube 14 this evening
Here are a few pictures:
First, Added the live rock. This was ordered from Premium Aquatics and cured in my basement for a few weeks.

After Adding the sand – a 1/2 inch sandbed, I added the water (SpG 1.025)

A few hours later, the dust has settled

Live Rock curing and Aquascape ideas
My live rock has been curing in my basement for 5 days now. Water parameters indicate active bacteria:
5/17 NH4. 0.25
N02. 0.25
NO3. 20
pH. 7.8
SpG. 1.025
Temp. 78.7
I’ve cut out some grate in the proportions of the BioCube, and was playing with some aquascape ideas.

Live rock is here
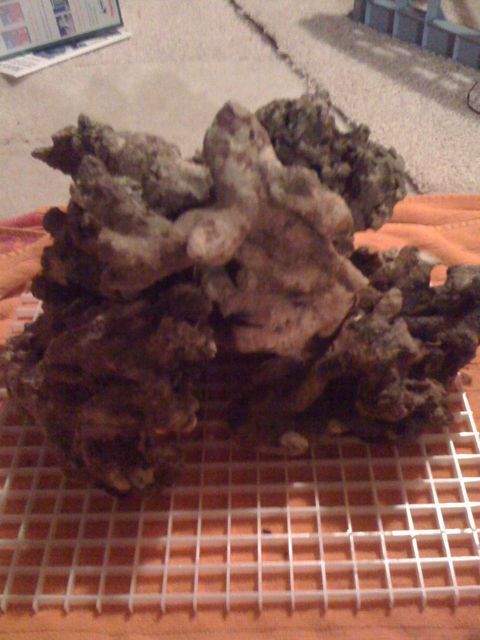
 Today I received some Live Rock from Premium Aquatics. I ordered from here based on the generally good reputation that this company has on the reef tank forums. All looks good. There are 6 or 7 rocks, all of which have spots of coraline. I haven’t looked real closely yet, but so far no hitchhikers.
I plan to keep the rocks in the basement curing for a while. I’ll check the ammonia level every few days, and change the water frequently. This will allow me to plan out a good aquascape and to make sure I get rid of any nasty critters that may have come along for the ride.
A few minor tweaks
 A quick update. I replaced the LED moonlights and the fan board in my hood. I also spent some time organizing all of the wires and cords in the stand. I have a 7 gallon batch of salt water mixed to a SpG 1.025 in the brute. I’m ready to order my live rock. Went to LFS today, but I didn’t see any rock the looked right.
Photos of RO/DI install
So, I’ve installed the RO/DI system that I recently purchased from Melev’s Reef. I wanted to post some detailed photos of the install. As I’ve said, we had an existing RO drinking water system in our house. My goal was to install the RO/DI system in place of this system.
First off, I was able to use the existing tap in the water line. Cool, because i wasn’t all that excited about putting another hole in the copper tubing.

This hooked right into the RO/DI inlet. The system is hung on a floor joist in the basement, right under the kitchen sink

The water goes through the 4 reverse osmosis filters and is pressurized by a booster pump. There is not an outlet close by, so I ran an extension cord along the ceiling and plugged it into a nearby GFCI outlet. In this picture, you can see the blue outlet tube running from top to bottom. There is a T-connector with a line that runs to the DI filter. Below the T-connector is an on/off valve that goes on to the drinking water system.

From to DI canister, the water empties into a bucket.

Then there is another T-connector with a line that goes down to the pressurized holding tank. The 3/8″ line is connected into the 1/4″ existing drinking water line that goes up to the kitchen sink. I thought that this might be a problem, but it turns out so far that it is not.

The pressurized holding tank gives the system enough pressure for water to travel up to the kitchen. I wasn’t sure if I could connect this into the new system, but I did and it works!

Here you can see the existing drinking water line going up into the kitchen, with a branch off to the refrigerator.
The waste water from the system is routed into an existing drain that we have for an air humidifier on our heating system. (ironically, you can see our de-humidifier in the background :))

The RO/DI system also came with a in/out TDS meter that I’ve installed on the floor joist.

I’m happy to have it hooked up. It produces about 1 gallon of RO/DI water in 20 minutes. The system is rated at 150 GPD, but I’m getting 72. The drinking water system works really well, and we have better water pressure than we had before.
Installing RO/DI
Tonight I installed my new RO/DI system from Melev’s Reef. I replaced my old RO drinking water system, and I’m attempting to hook into the line that goes to the kitchen sink and refrigerator upstairs.
The problem is the outlet on the new system is 1/4″ and the old system is 3/8″. I was able to get an adapter at Lowe’s.
Also, I’ve tried to hook up the reservoir tank from the old system. This adds pressure, but it dissipates when the tank is emptied.
I’m continuing to tinker with it. I’m sure I can get it to work.
Here’s the old system, with the filter media removed

And here’s the new system, in place and about to be hooked up.

Brutes
 As my reef-tank project slowly progresses, I found myself today in Wasserstrom’s Restaurant Supply Superstore. I went there looking for food grade 10 gallon Rubbermaid brute containers. The people who helped me there assumed that I was going to use them to brew my own beer. Since I was in a hurry, I let them think that. I wish that I had a few minutes to browse the store. It’s kitchen gadget
  overload.
Anyway, I plan to use these buckets to cure my live rock. I want just out of the ocean rock that is potentially loaded with hitchhikers. I also want to cycle them outside the display tank to minimize the grunge. This will also give me time to get to know the rocks so that I can aqua-scape with a plan.
The last iteration of the cube was running for three years, and I was never satisfied with the aquascaping. I could never get them to look like anything but a pile of rocks.
Lights! BioCube 14 lighting upgrade
Well, I spent some quality time with my BioCube 14 hood, and installed the Nanotuners 3.24 lighting upgrade. I don’t consider my self very handy, but sometimes I surprise myself. I was able to confidently cut wires and remove things without too much hassle. In the end, it all works, and I was uninjured, except for a small cut on my thumb…a battle-scar, if you will.
Alright, here is photographic evidence. First, I assembled my weapons:

Here is the opponent, a stock BioCube 14 hood. It only has a wee 48 watts of light.

With a bit of a struggle, I gutted it. Here are its exposed entrails.

At long last, I was able to tame the beast. Here it sits, calmly with 72 watts of light

And just to prove that it works…

Nanotuners 3.24 upgrade here
I just received my nanotuners lighting upgrade in the mail today. I’m a bit intimidated by all of the wiring involved in the install.
I’m also contemplating getting an RO/DI system. We have a RO system in our house for drinking water, and uv attached a DI canister to it. It makes water very slowly.
My thought is that I want to cure my live rock in a bucket, not in the tank. I would use 10 gallon brutes and would need to do 100% water changes twice a week. This would allow me to put nice clean rocks in my tank. It would also give me the opportunity to plan out my aquascaping and set it up nicely with PVC, eggcrate and zip ties. To do this I would have to have increased capacity to make water.
I’ll think about it.
Received media basket and rear fish guard from InTank LLC today
I just received the media basket and fish-guard this afternoon.
I notice as I plan and set up this version of the biocube, I’m feeling more confident and I’m not in a hurry. I hope that this pays off down the road.
Nanotuners called me yesterday and said that they were out of the moonlight upgrade for the BC14 3.24 lighting upgrade. A little disappointed, but it did knock off $30 from my order.
Now that I have this media rack, I’m wondering if I should be running any of the filter media during the cycle. Posted and the forums, We’ll see what they say.
I’m also wondering if I should get a new RO/DI system. We had an RO drinking water system when I moved here, I just connected in a DI resin unit to make fish tank water. The problem is that is only puts out a paltry 9 GPD, and my family can’t use the RO system while I’m making fish water. It might be nice to get a second system, Any good high qualty/low economic suggestions.
Waiting for upgrades
Awaiting the Lighting upgrade kit, media rack and ATO system. In the mean time, I’ve continued trolling the forums. It seems that the prevalent opinion is that a Lawnmower Blenny may be too large for my tank, and may not have any interest in munching on hair algae.
I’m now considering a Tail Spot Blenny or a Hector’s Goby.
It’s fun to research fish!
Game Plan
Here’s my plan for re-doing the Cube:
Mods:
Media rack in chamber 2 (from InTank LLC.) – will use polyfilter, Purigen, and chemipure
Remove stock Oceanic carbon floss filter, BioBalls and sponge
Tank Setup
Replace stock return pump with Maxijet 900, in tank Koralia Nano
3.24 lighting upgrade from Nanotuners
1 inch sand bed
10 lbs. live rock
RO/DI water – salinity 1.025
Will add sand & Live Rock – and cycle for a few weeks. Then add CUC, then fish, then corals
Weekly 2 gallon water changes upon completion of the cycle
JBJ ATO system for fresh water auto top-off
Livestock
Clean-up Crew: 4 Astrea, 4 Cerith, 4 Narssarius, Cleaner Shrimp,Emerald Crab
Fish: Lawnmower Blenny, Purple Firefish
Coral: Zoa’s & Mushrooms
The Rebirth of a BioCube!

Dead BioCube 14
I’m starting a blog to chronicle the re-birth of my BioCube 14. I’ve had this tank for about 3 years, and at one point it was doing relatively well.
Over time, I started missing a few water changes, and began to lose the battle with hair algae. As the tank became uglier, I started to lose interest, and eventually everything died. I just let it run with the lights off for a few weeks, in denial about its demise.
I thought to myself, “I can do better than that!” So I decided to make a new start. I removed everything and gave the cube a thorough cleaning. I’ve also spent some time trolling sites like nano-reef.com, Reef Central and Talking Reef to get some ideas and inspiration.
I’ve developed a new found excitement for this hobby. Over the next few months I hope to show the step by step process of creating a little piece of the ocean in my living room.
Stay tuned!
